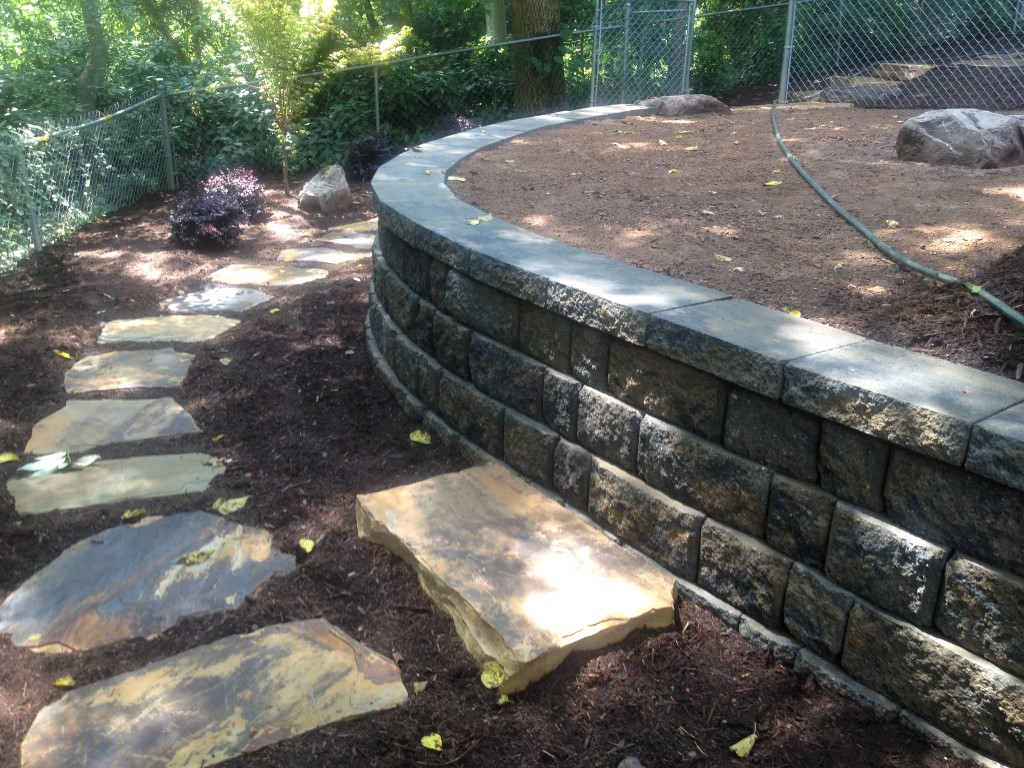
 Once you’ve chosen a location for your wall, now you can choose the style and materials. Materials like natural stone, bricks, concrete blocks, or treated wood can all be used. Some are more expensive but will last longer and visa-versa. It simply depends on your budget, tastes, and long-term plan with this wall. You’ll simply want to make sure that the design harmonizes with your home and gardens.
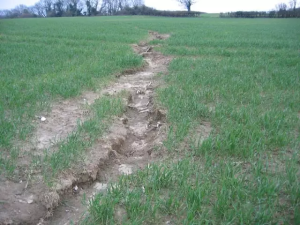
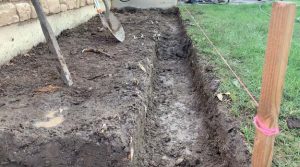 Once you feel you are ready, start digging a trench where your retaining will be located. The depth of the trench should be determined by the height of the wall you plan to build, plus an additional 6 inches for a stable foundation. Ensure that the trench’s width is enough to accommodate the first layer of the chosen material.
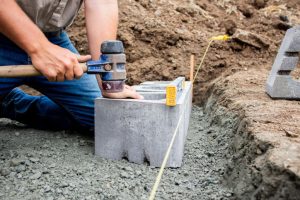 As you are adding each stone or brick, use a level and a rubber mallet to ensure they are level and aligned with the string guides that you installed earlier. This is most important on the first level.
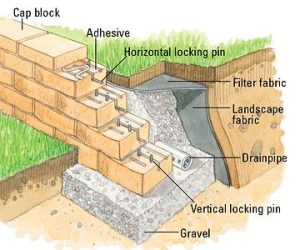
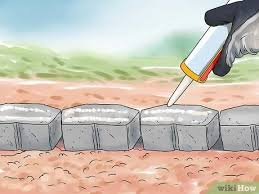 Depending on the material you’re using, you may need to apply adhesive or mortar between the stones or bricks to hold them in place securely.
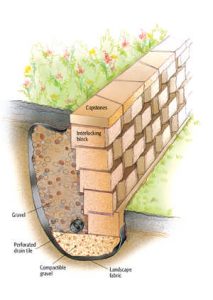
 As you go along, make sure to fill in any gaps between the stones or bricks with crushed stone or gravel. This will aid in drainage and provide additional stability.
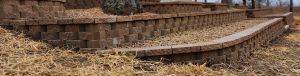
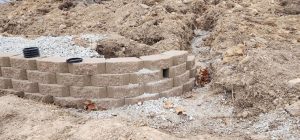 Continue building subsequent courses of stones or bricks, staggering the joints to create a sturdy and visually appealing wall. Check for level and alignment after each course.
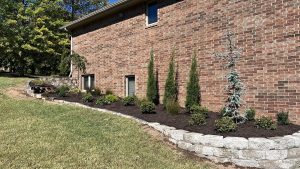 After the retaining wall is complete and backfilled, now you can either plant your grass seed or your landscape plants such as flowers, shrubs, and trees. Use appropriate spacing to ensure a healthy and vibrant landscape or lawn for years to come.
 It’s complete! As you probably gathered from reading this article, building a retaining wall can be time consuming and expensive, but also rewarding. A beautifully built landscape will enhance both the aesthetics and functionality of your outdoor space. With careful planning, the right materials, and proper constuction techniques, you can create a visually stunning and long-lasting addition to your garden that will be admired for years to come. Remember to follow safety guidelines, take your time with each step, and don’t hesitate to seek professional advice if needed. By implememting regular maintenance practices, your landscape retaining wall will stand the test of time, providing a beautiful and functional enhancement to your garden for generations.
Happy landscaping out there!